
You want to burn calories, but your hips ache and your back curves forward when you stand for long. This guide gives you a safe, five-move routine to build hip strength, correct your alignment, and support a healthy metabolism.
In short: This routine is for anyone with desk-related hip stiffness or mild lower back tension. You should perform it three to four times a week. It builds the muscles that keep your pelvis level and your spine stacked, which makes walking and standing more efficient and comfortable.
Quick picks
Our shortlist for this job · tap one to see today's price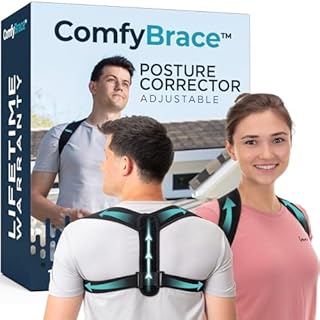
Provides gentle tension reminders to help you maintain spinal alignment during daily activities.

Helps release tight hip flexors and quadriceps after your strength training sessions.
Check your safety before lifting
Your hip health affects your overall posture. If you have a history of hip arthritis, a torn labrum, or a herniated disc, move slowly. Do not push through sharp pain. If you feel a pinching sensation that travels down your leg, stop the exercise immediately. We go through hampton roads weight loss pricing step by step in its own article.
- Stop if you feel sharp, shooting pain in the groin or buttock.
- Pause if your hip feels unstable or gives way.
- Rest if the joint swells or becomes hot to the touch.
- Consult a doctor before starting if you are on blood thinners.
It is okay to feel mild muscle fatigue. That is the desired signal. It is not okay to feel joint pain. That signal means you are moving outside a safe range.
Safety first: Listen to your body. Pain is a signal to stop. Discomfort from effort is normal, but joint pain is not. It helps to understand what is the Ice Hack Weight Loss Diet before going further.
Warm up with 5 minutes of movement
You need blood flow before you load the joints. This prevents the stiffness that often makes posture worse. Do not rush this part. It is the foundation of your session.
- Step in place for one minute, keeping your knees relaxed.
- Perform 10 gentle arm circles to wake up the upper body.
- Do 10 slow, controlled marching movements, lifting knees to waist height.
- Stand tall and take three deep breaths, focusing on expanding the ribs.
This sequence is low impact. It raises your core temperature safely. It prepares the hip flexors and back muscles for the heavier work ahead.
Build a strong base with hip bridges
The gluteus maximus is your primary hip extensor. When it is weak, your lower back takes over, causing a forward pelvic tilt. The hip bridge directly strengthens this muscle. It also improves the connection between your core and your hips.
- Lie on your back with knees bent and feet flat on the floor, hip-width apart.
- Press through your heels and lift your hips until your body forms a straight line from knees to shoulders.
- Squeeze your glutes at the top for two seconds. Keep your ribs down.
- Lower your hips to the floor slowly, repeating the movement without resting completely.
Perform three sets of 12 to 15 repetitions. Do not arch your lower back to lift the hips higher. The strength must come from the butt muscles, not the spine. Loaders in this spot often ask about what color waist beads as well.
Using a posture corrector after this exercise helps you remember the straight spine position you just trained for.
- Say Hello to a Pain-Free Life- The Comfy Brace posture corrector aims to relieve
- Innovative Design - Our proprietary design is orthopedically created to correct your
Open tight hips with single-leg stands
Most people who sit at desks have short, tight hip flexors. This pulls the pelvis forward and curves the lower back. A single-leg stand stretches the hip on the lifted side. It also forces the standing leg to stabilize the entire pelvis.
- Stand behind a chair or wall for balance support.
- Lift one knee to the front. Do not let your hips drop or tilt to the side.
- Hold the position for 30 seconds, breathing normally.
- Switch legs and repeat. Aim for three sets on each side.
If you wobble too much, hold the support. As you get stronger, let go of the support. This exercise teaches your brain to control your hip position without visual cues.
Improve posture with the reverse lunges
Reverse lunges are safer for the hip joint than forward lunges. They place less torque on the knee. They also require significant glute activation. This helps move the weight of your body back over the mid-foot, correcting a forward-leaning posture.
- Stand tall with feet hip-width apart. Engage your core.
- Step one foot back about two feet. Keep the front shin vertical.
- Lower your back knee toward the floor. Stop just before it touches the ground.
- Drive through the front heel to return to the standing position.
Do two to three sets of eight to twelve reps per leg. Keep your chest up and your eyes forward. Do not let the front knee collapse inward. Push the knee out to align with the toes. The other half of this decision is does Magnesium Really Help With Weight Loss Fast.
Recovery and stretching with a foam roller
Strength work creates micro-tears in the muscle. You need to allow them to heal. Rolling the quadriceps and hip flexors after a session improves blood flow. It reduces the stiffness that makes posture feel heavy the next day.
- Place a foam roller under your quads, just below the hip.
- Support yourself on your hands and feet. Lift your hips slightly.
- Roll slowly from the knee to the upper thigh, avoiding the hip crease directly.
- Spend 20 to 30 seconds on each leg before moving to the next area.
Do not roll directly over bones or joints. Focus on the muscle bellies. If the pain feels sharp or like a pinch, stop rolling. Mild discomfort is normal. Sharp pain means the tissue is irritated. If that sounds like your bench, read up on strength training for better posture next.
A high-density foam roller provides the firmness needed to reach deep hip flexor tissues effectively.
- High-density foam roller in Black
- Ideal for balance, strengthening, and flexibility exercises
How to progress safely over weeks
Progression is about volume, not speed. In week one, use body weight only. In week two, add a few more repetitions. In week three, you can add a light resistance band around the ankles for the lunges. This increases the demand on the hip abductors. These muscles keep the pelvis stable and level.
- Week 1: Focus on perfect form. Do not rush the reps.
- Week 2: Add one repetition to each exercise. Keep the rest periods short.
- Week 3: Add a 10 lb plate or dumbbell held at the chest for bridges.
- Week 4: Test your balance on the single-leg stand without holding on.
Listen to your joints. If you can do the top of the range with ease, you are ready for the next step. If you struggle with the form, stay at the current level. Quality movement builds posture. Quantity movement builds fatigue.
Pro tip: Track your progress in a simple note app. Write down the number of reps you completed each time.
A quick reference for your routine
| Exercise | Sets/Time | Primary Benefit | Easier Version |
|---|---|---|---|
| Hip Bridge | 3 x 12 reps | Glute strength | Lower the lift height slightly |
| Single-Leg Stand | 3 x 30 sec | Balance & Hip Flexor Stretch | Keep hands on the chair |
| Reverse Lunge | 2 x 10 reps | Posture & Leg Strength | Take a smaller step back |
| Foam Rolling | 5 minutes | Recovery & Flexibility | Use a lighter density roller |
Keep this table nearby. It helps you remember the safe ranges of motion. You do not need to perfect every rep on every day. Consistency is the driver of long-term change.
The bottom line
Start with the bodyweight routine three times a week. Focus on the hip bridge and reverse lunge to build the foundation for better posture. Use a posture corrector as a reminder tool, not a permanent crutch. If you feel pain that lasts more than two days, stop the routine and see a doctor.
- Say Hello to a Pain-Free Life- The Comfy Brace posture corrector aims to relieve
- Innovative Design - Our proprietary design is orthopedically created to correct your
Frequently asked questions
Do hip exercises actually help with weight loss?
Hip exercises build muscle mass in the largest muscle group in the body. More muscle increases your resting metabolic rate. This means you burn more calories even when you are sitting still. However, the calories burned from the exercises themselves are modest. The biggest benefit is improved movement efficiency for your daily life and cardio work. If that sounds like your bench, read up on 30 minute step goals next.
How often should I do this routine?
You should perform the strength exercises three to four times a week. Allow at least one day of rest between sessions so the muscles can recover. You can do the light stretching and foam rolling on your rest days. This keeps the hips loose without overworking the joints.
Can I do these exercises if I have a desk job?
Yes, this routine is specifically designed for desk workers. It targets the tight hip flexors and weak glutes caused by sitting. It also includes balance work that counters the forward lean. Start with the easier versions if you feel stiff. Gradually move to the full range as your mobility improves.
What if I feel a pinch in my hip after the exercise?
A pinch usually means you have moved your joint into a range that is not yet comfortable. Stop the movement and return to a pain-free position. Do not try to force the range of motion. If the pinch persists for more than 48 hours, or if it becomes a sharp pain, consult a physical therapist or doctor.